Macros➧
Overview
Macros is a component delivered separately, which allows the user to enhance the System's functions by executing custom CLI commands on their devices, utilizing a simple graphical interface, i.e., viewing logs, snooping, or even VLAN management on specified ports.
Attention
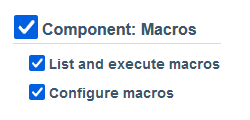
Creation and macro usage require specific Role Permissions settings.
They can be found in Users management > Roles menu > Component: Macros.
Pick and choose different combinations for different User Roles for additional security.
Warning
Macros only work on Devices that support multi_console_command, see more.
Tip
You can find and download macro examples on our demo website and find detailed explanations of some sample macros on the Twig template examples page.
Macros menu➧
Info
Macros menu can be found under Configuration > Macros in the left-side drawer.
Here you can create a new macro from scratch or Import a premade one.
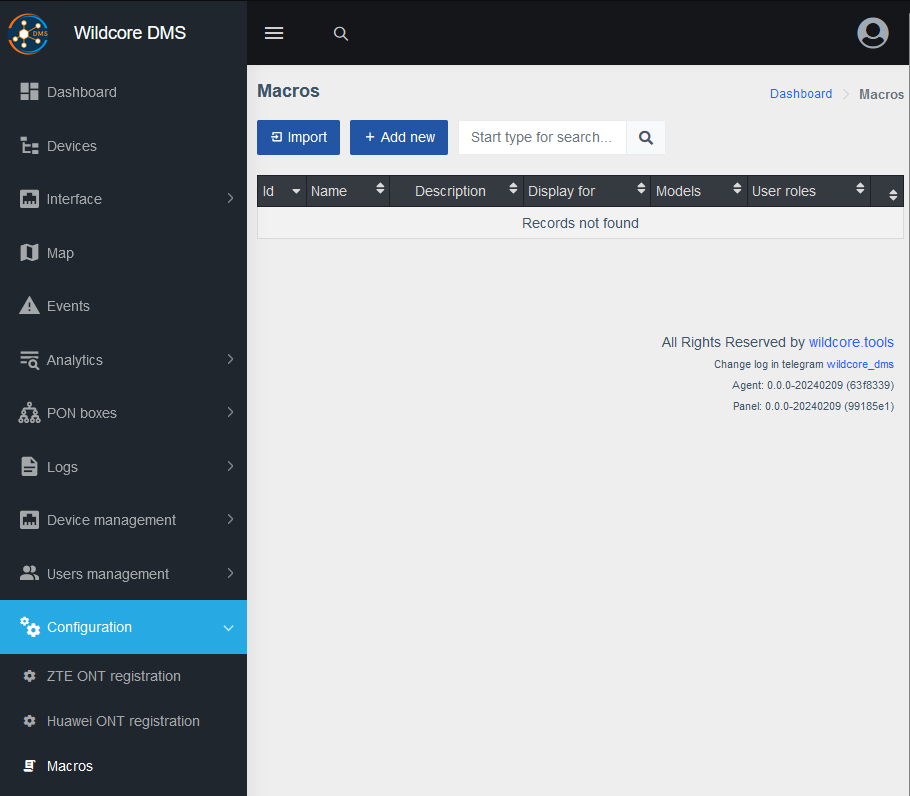
Opening the Macros menu for the first time
Creating a basic macro➧
In this section we will go through the macro creation process step-by-step.
-
On the Macros screen press the Add new button in the upper-left corner to create a new one.
Info
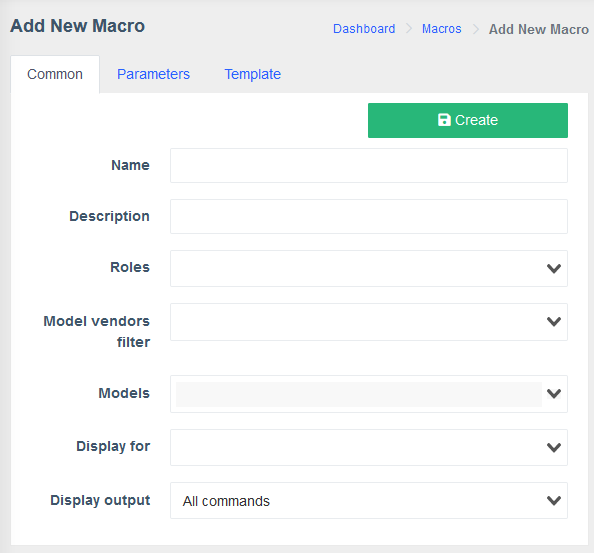
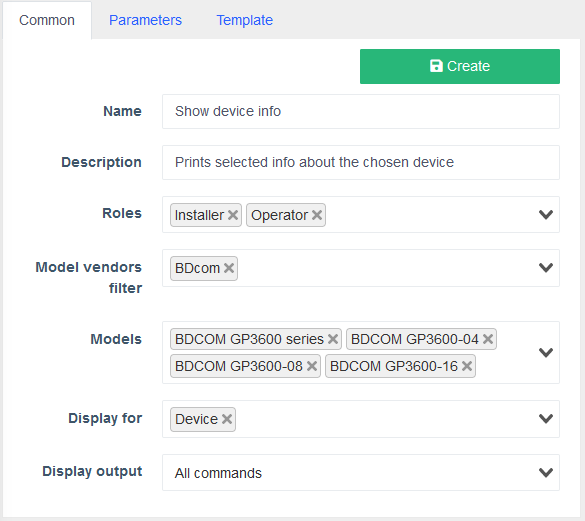
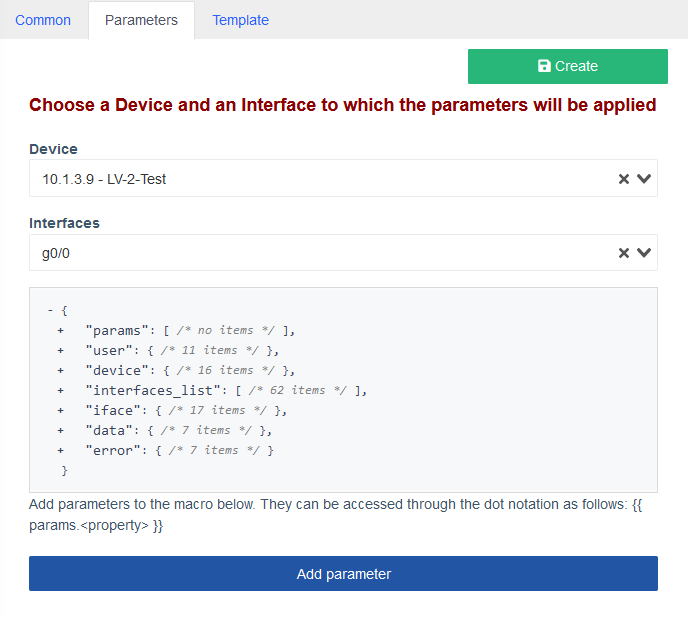
Name Description Common Here, the name, users, and device models allowed to run it, as well as visibility areas, are specified. The latter allows greater customization and interface decluttering by hiding macros that are not applicable to the selected context. Parameters This section encompasses the Parameters of the macro. In the Device field, the device on which the macro runs is specified, and Variables are loaded from cache as a JSON structure for ease of access.
With the Interfaces drop-down, you can select a specific interface on which the macro would be executed, after which an additional variableifaceis loaded, that contains information about this interface.
The Add parameter button creates a new entry where the{{params}}object properties can be specified, which can then be accessed by the macro (see Template section).Template Templates are built with the Twig template engine, allowing for the inclusion of variables in commands, creation and assignment of custom variables, as well as branching and text permutations within the template. Refer to the Twig Documentation for further details. -
Fill out the Common tab
Info
- Choose a Name that reflects the purpose of your macro from the first glance.
- Description allows you to describe features or direct it's user.
- In Roles drop-down you can select which user roles are permitted to execute this macro.
- Model vendors filter allows you to filter the Devices by vendor for convenience.
- Models field allows you to select specific devices on which the macro can be run.
- Display for allows you to customize where exactly this macro can be run, i.e., on a whole
Deviceor only on aPortor aONU. - Display output defines whether you want to get feedback from all commands executed by the macro, just the last one or no output at all.
Example
-
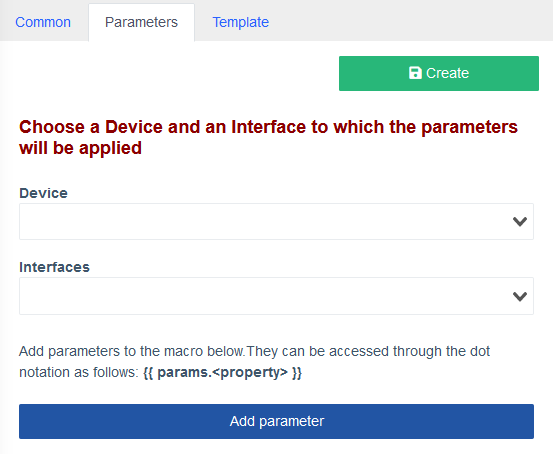
Parameters
Info
- Device drop-down allows you to select a device, on which this macro will be run and load it's Variables.
- Interfaces loads an additional variable
iface, which stores this port's description.
Selecting a Device at this stage is optional, you can press the Add parameter button right away.
Example
-
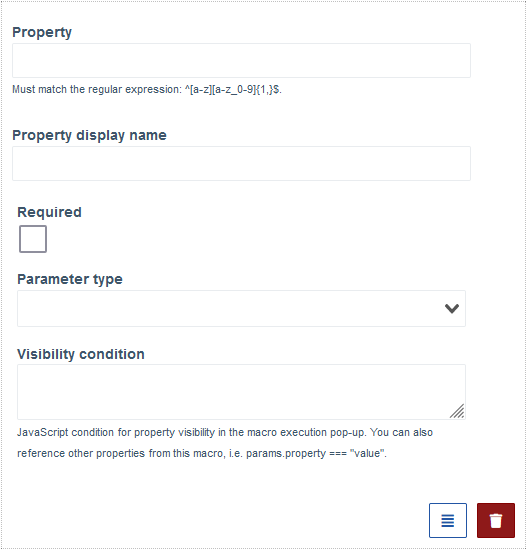
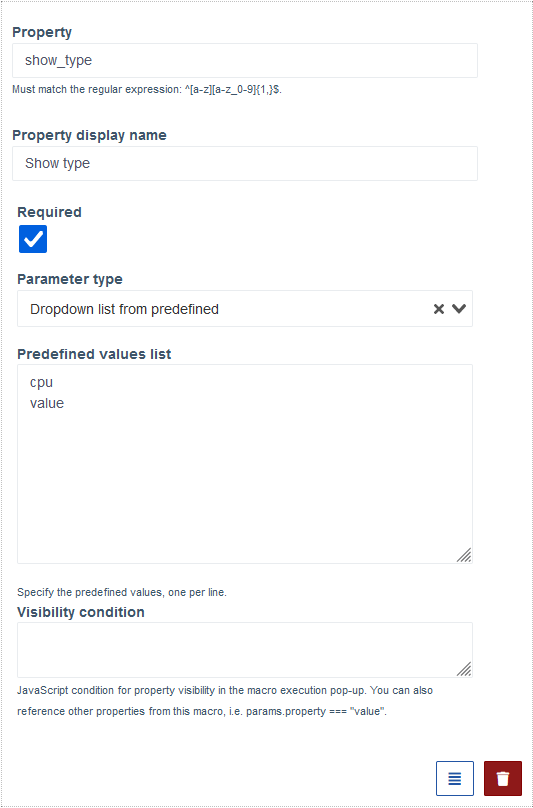
Press the Add parameter button, a new Parameter card will appear.
Fill out the required fields in the Parameter card.
Info
- Property: This is the
{{params}}object property name, used to access its value in the Template by using{{params.property}}. - Property display name: Provide a short description for your property, which will be displayed in the macro execution pop-up.
- Required checkbox: Specify whether the parameter must be selected during macro execution.
- To help you choose the right Parameter type, refer to the Parameter type options.
- Visibility condition: This field defines whether the macro is shown. For example,
!ifacehides it from the device'sInterfacepanel.
Example
Tip
 button allows drag-and-drop reordering of the Parameters
 - Property: This is the
-
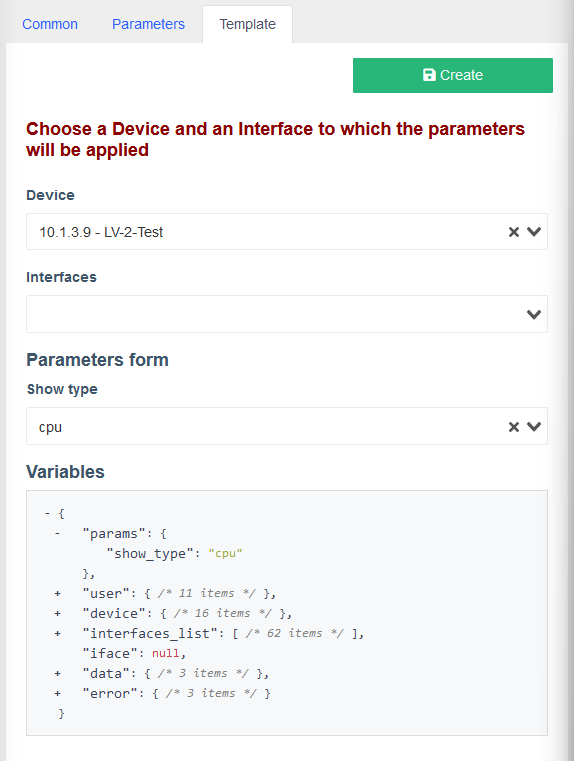
Select a Device and an Interface in the Template tab.
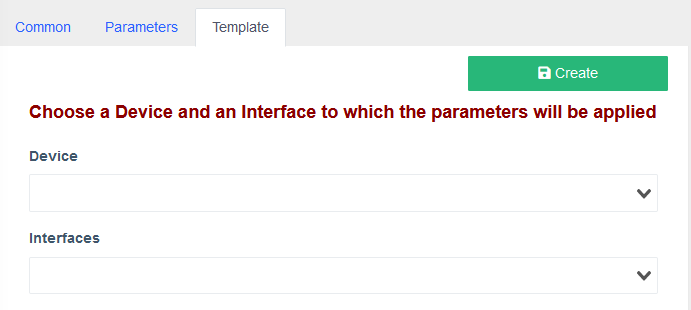
Info
This step is optional and is required to get the cached variables from the device for ease of access.
A new Parameters form block will appear, which shows the Parameters you've created in the previous step.
Example
-
Create a Twig-style Template for your macro.

Info
You can create a Template from scratch or use one of the examples below.
After you've filled out the Chosen template block, Live result shows the result of your Template compilation and the exact command that will be executed on a selected Device.
For syntax refer to Twig Documentation for Designers.
Find more Template examples here.
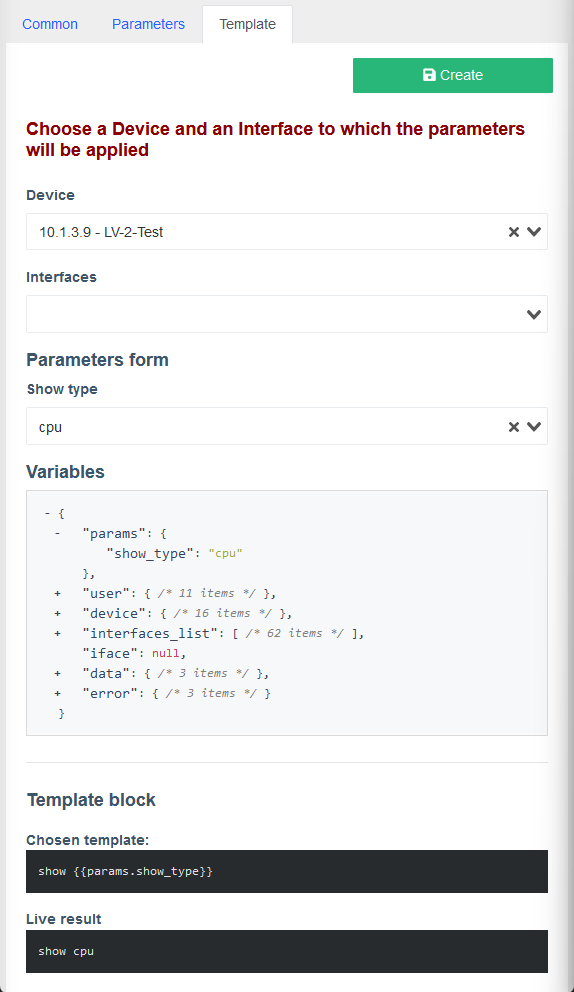
Chosen template: -
Press Create button
Tip
All your macros are shown in the Macros menu as a table, along with the Edit, Delete, Clone and Export buttons.
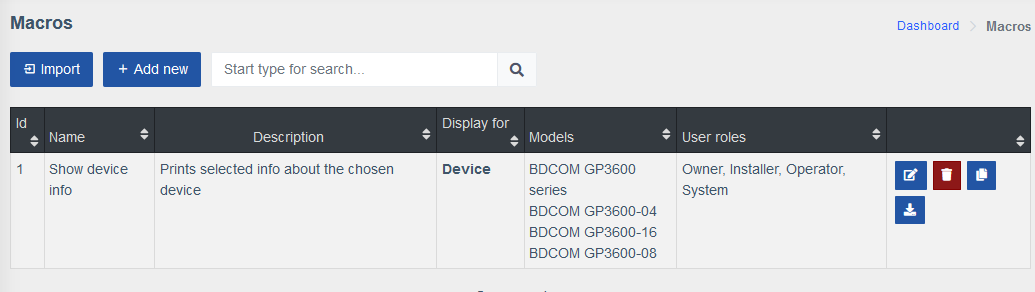
Icon Name Description 
Edit Use this button to edit a saved macro. 
Delete Use this button to delete a macro. 
Clone Use this button to create a copy of a macro. 
Export Use this button to save a macro locally in JSONformat.
The Roles seleted are removed for safety.
Macro usage➧
To use the macro created in the Creating a basic macro section, navigate to the Device/Port you specified for it and select the Macros tab.
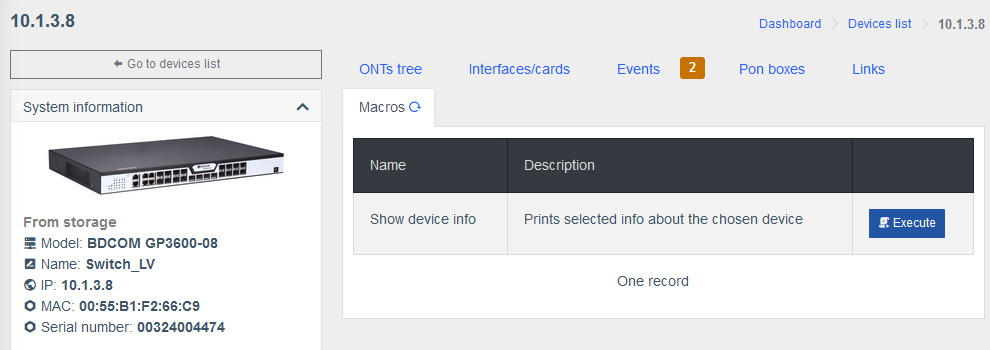
When you click Execute button, a new dialogue will pop up.
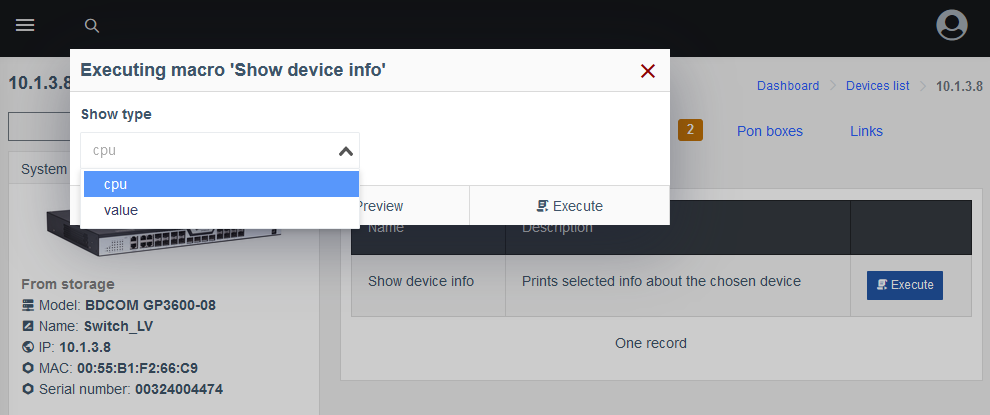
Here are the Displayed name and values we specified earlier in the Parameters tab.
Tip
Preview button allows you to see what the command will look like when it's executed on selected device
By pressing Execute button, the macro is run and the result is displayed in a new pop-up, if the Display output was set to anything other than Not display.
Changelog
| Release № | Changes |
|---|---|
0.21.004 |
Added Macros documentation |